
What if the right finish for your wood isn't really about color at all? Many homeowners start the wood stain vs paint choice by picturing a shade they like. That's understandable, but it skips the questions that decide how the job turns out. How much prep will your surface need? How will the finish handle moisture and daily wear? And if people will be living or working nearby, how should the work be scheduled?
Table of Contents
- Wood Stain and Paint Side by Side
- How Stain and Paint Sit on the Wood
- Surface Preparation for Each Finish
- Durability, Moisture and Upkeep Over Time
- Indoor Air Quality and Occupied Spaces
- Choosing the Right Finish for Your Project
- Common Questions About Stain and Paint
- Confirm Your Finish Before the Work Starts
Wood Stain and Paint Side by Side
Stain adds color while the grain shows through. Paint forms an opaque film that hides the grain.
That's the core difference, and almost every other trade-off flows from it. If you remember nothing else, remember that one finish works with what the wood already looks like, and the other covers it.
Wood Stain vs Paint at a Glance
| Factor | Wood Stain | Paint |
|---|---|---|
| Grain visibility | Grain stays visible | Grain is hidden under an opaque film |
| Color change | Adds tone while keeping the wood's character | Any uniform color, fully opaque |
| How it sits on wood | Soaks into the surface | Forms a film on top |
| Tolerance of rough prep | Shows sanding marks, glue residue and uneven porosity | Hides minor flaws when primed correctly |
| Repairs and mismatched wood | Hard to hide | Easier to conceal |
| Look as it ages | Wears gradually and can be refreshed | Chips or peels where the film breaks |
| Best fit | Oak, maple, walnut and other figured woods | Uniform color, mismatched or repaired surfaces |
Here's the short answer. Choose stain when the wood itself is the feature you want people to see. Choose paint when you want one even color, or when you need to hide flaws, repairs, or boards that don't match each other.
Practical rule: If you'd be sad to cover the grain, look at stain first. If you'd be relieved to cover it, look at paint first.
The table describes typical behavior, not a promise for every product. The exact result depends on your wood species, the specific product used, and how well the surface was prepared. A beautifully figured oak door and a plain, patched cabinet box won't respond the same way, even with the same can of finish.
Product type matters too. Stains range from clear and semi-transparent to more solid options that show less grain. Paints vary in sheen, hardness, and how they're applied, which changes both the look and how they wear. That's why a finish that works well on one project can disappoint on another.
Use the table as a starting point, then test your choice against your own project. The sections that follow explain why each row matters, from how the finish sits on the wood to how it holds up over time and what it means for occupied spaces.
How Stain and Paint Sit on the Wood
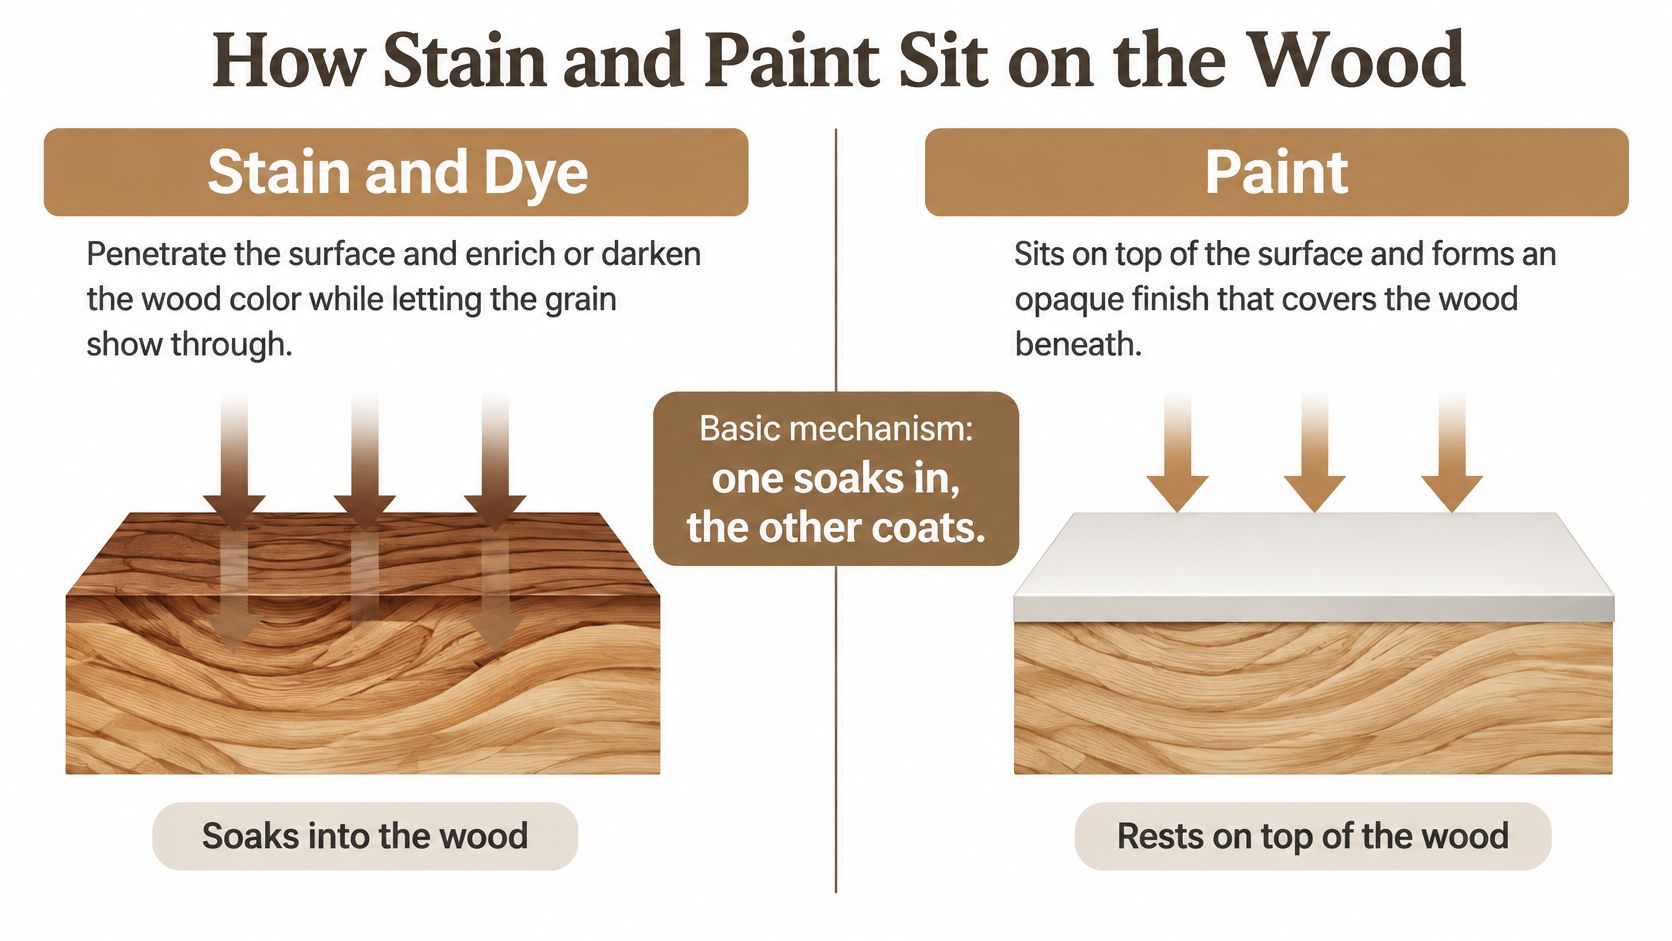
Think of stain as color that moves into the wood, and paint as color that sits on it. That simple picture explains most of what you'll see once the finish dries.
The National Park Service guidance on wood objects explains that stains and dyes are commonly used to enrich or darken wood color and generally penetrate the surface rather than forming a continuous film. Paint, by contrast, is an opaque coating that conceals the underlying grain and creates a visible surface layer.
What That Means for Your Wood
Because stain soaks in, the patterns already in the wood stay part of the finished look. That's why stain suits oak, maple, or walnut when you want those patterns to show. The color deepens or shifts, but the piece still reads clearly as that species of wood.
Paint works the other way. The film on top gives you a uniform color across the whole surface. That's useful when a piece has mismatched components, visible repairs, or defects you'd rather not feature. A cabinet run built from mixed boards, for example, can look patchy under stain and perfectly even under paint.
Protection Is Not Only About Paint
It's tempting to assume only paint protects wood, since you can see its layer. In practice, both transparent and pigmented finishes can protect wood from spills and light damage and slow the transfer of water vapor. The protection comes from the full finish system, including any clear topcoat over stain, not from color alone.
There's one light-related difference worth knowing. Alcohol-based and water-based stains are more sensitive to light, while oil-based stain is more resilient. For a sunny entry door or a bright kitchen, that can influence which stain type makes sense.
Existing finish matters as well. When an old finish is nearly worn away or was never right for the piece, refinishing usually makes sense. When a sound, appropriate finish is still there, preserving it can be the better call.
Try this simple test before you decide. Look at your wood in good daylight and ask one question. Is the grain part of what you like about it? If yes, you're probably a stain candidate. If the honest answer is no, or the surface is a mix of repairs and mismatched pieces, paint will likely serve you better. Either answer is a good starting point, and neither locks you in until you've seen a sample.
Surface Preparation for Each Finish
Preparation matters as much as the product you pick, but stain and paint ask for it in different ways. Get prep wrong and even a good finish will show it.
What Paint Needs
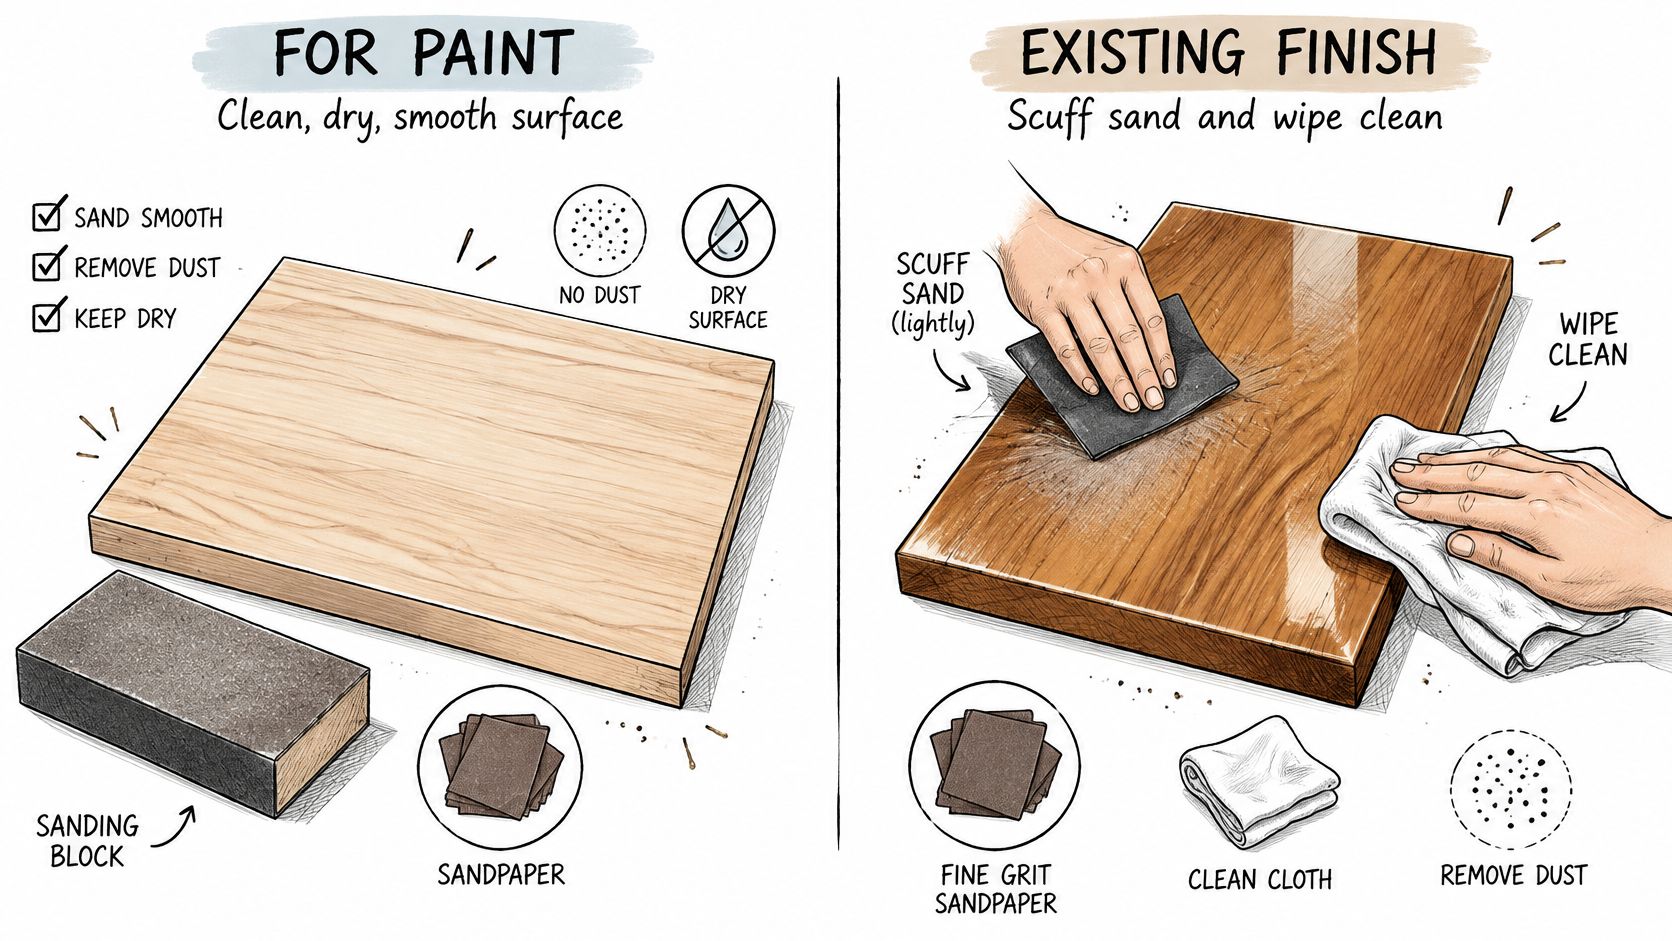
Paint needs a surface that's clean, dry, and sound. Kitchen cabinets collect grease that blocks adhesion, so degreasing comes first. Glossy or previously finished pieces usually need cleaning, scuff sanding, and a bonding primer that suits the existing finish.
In our cabinet painting work, minor damage is filled and a bonding primer is applied before the color. That primer step is what helps paint grip and hide small imperfections underneath. How the color goes on matters too, and our guide to spray gun versus roller application explains how application method affects the final surface.
What Stain Needs
Stain is less forgiving than paint. Sanding marks, glue residue, and uneven porosity can show up as dark blotches once color goes on, because stain reveals the surface instead of covering it. Edges, profiles, joints, and end grain need attention too, since they soak up more finish and can turn out darker than flat faces.
The same stain can also look quite different on oak than on maple or another tighter-grained wood. We adjust our preparation and finishing process to the specific wood species, because different woods absorb stain differently. We also prepare stain samples on your own cabinet doors so you can approve the color before the work continues. A label or store swatch can't tell you what your wood will do.
Checks Before Any Color Goes On
- Cleanliness first: Remove grease, dust, and residue so the finish can bond or absorb evenly.
- Existing finish: Note whether it's intact, worn, peeling, or glossy, since each condition changes the prep.
- Repairs and filler: Fix dents and damage now, because filler takes stain differently than wood.
- Sanding level: Confirm the scuff pattern is even, with no missed spots or deep scratches.
- Species and porosity: Identify the wood and how readily it absorbs color.
- Primer or sealer fit: Match the primer or sealer to both the old surface and the new finish.
Cabinet painting, cabinet staining, and cabinet refinishing all follow this checklist, just with different emphasis. Paint leans on primer compatibility. Stain leans on sanding quality and test samples. Neither shortcut shows up on day one, but both show up later, which is why careful prep is worth the time it takes.
Durability, Moisture and Upkeep Over Time
Durability depends on the whole system, not the word on the can. Wood species, exposure, coating type, preparation, and upkeep all shape how long a finish performs.
USDA Forest Service research on exterior coatings found that all tested exterior coatings substantially reduced water uptake compared with uncoated wood. The research also points to a key requirement. A high-performing coating should repel liquid water while allowing water vapor to escape, which lowers the risk of blistering, peeling, and deterioration underneath.
What the Moisture Findings Mean for You
One result surprises many people. In that test set, transparent coatings averaged lower water uptake than semi-transparent coatings and paints. So you can't judge moisture performance by whether a finish looks clear or solid. The specific product matters more than its transparency.
Longer exposure testing adds another useful point. Semi-transparent penetrating stains outlasted transparent water-repellent preservatives, with some stains containing only 20% binder providing excellent protection after eight years of exposure. Product choice within a category can change results a great deal.
How Each Finish Ages and Gets Fixed
- Stained surfaces: Wear tends to show gradually, and upkeep usually means cleaning and re-coating as areas look tired.
- Painted surfaces: Wear tends to show at chips or peeling spots where the film breaks, and repairs need to match color and sheen to blend in.
Where the wood lives changes the picture too. Cabinets and trim indoors mainly face handling, spills, and cleaning. Decks and entry doors face sun, heat, and rain. Our deck refinishing uses exterior stains and finishes selected to handle strong sun, heat, moisture, and changing weather, and we sand the deck flat, brighten it, and seal it with penetrating finishes that weather evenly instead of peeling. For business settings, our notes on caring for commercial wood surfaces cover upkeep for higher-traffic pieces.
No finish can honestly be promised a fixed number of years. Exposure, substrate, and maintenance decide that, and they differ on every project.
If you're weighing a specific door, deck, or set of cabinets, it's worth talking through how that surface is used. That's what turns general guidance into a sensible choice for your home or business.
Indoor Air Quality and Occupied Spaces
If your kitchen, restaurant, or office stays in use during the work, what's in the finish matters alongside how it looks. Solvent content is a practical factor to weigh, not a reason to avoid either stain or paint.
The EPA architectural coatings industry profile lists average VOC content of 527 grams per liter for solvent-based semitransparent stain, compared with 374 grams per liter for general primer or undercoater. The waterborne averages are 85 grams per liter for semitransparent stain and 48 grams per liter for general primer or undercoater.
| Product Category | Solvent-Based | Waterborne |
|---|---|---|
| Semitransparent stain | 527 grams per liter | 85 grams per liter |
| General primer or undercoater | 374 grams per liter | 48 grams per liter |
Why Stain Can Carry More VOCs
Semitransparent stains have a low solids-to-solvent ratio, and VOCs sit mostly in the solvent portion. On those averages, solvent-based semitransparent stain contains about 41% more VOC than the listed solvent-based primer category. That's a formulation trait, not a flaw in any single brand.
These are category averages, not a verdict on every product. Paint categories vary widely, and many modern waterborne products, stain and paint alike, have much lower VOC levels than older formulas. The useful takeaway is to compare the actual product you're considering, not just its color.
Planning Work Around People
- Check the data sheet: Compare VOC content for the specific products on your shortlist.
- Choose low-VOC where it fits: A low- or no-VOC option still needs to meet your durability needs.
- Ventilate well: Keep air moving during and after application, as the manufacturer directs.
- Finish loose pieces elsewhere: Doors and drawers can often be finished outside the occupied space when that's practical.
- Schedule around occupancy: Restaurants, hotels, offices, and multifamily buildings may need phased or off-hours work.
Local regulations and manufacturer instructions apply to professional projects, and they're part of planning from the start. Our overview of cabinet painting in Austin, TX shows how this kind of planning fits into a typical local project.
Choosing the Right Finish for Your Project
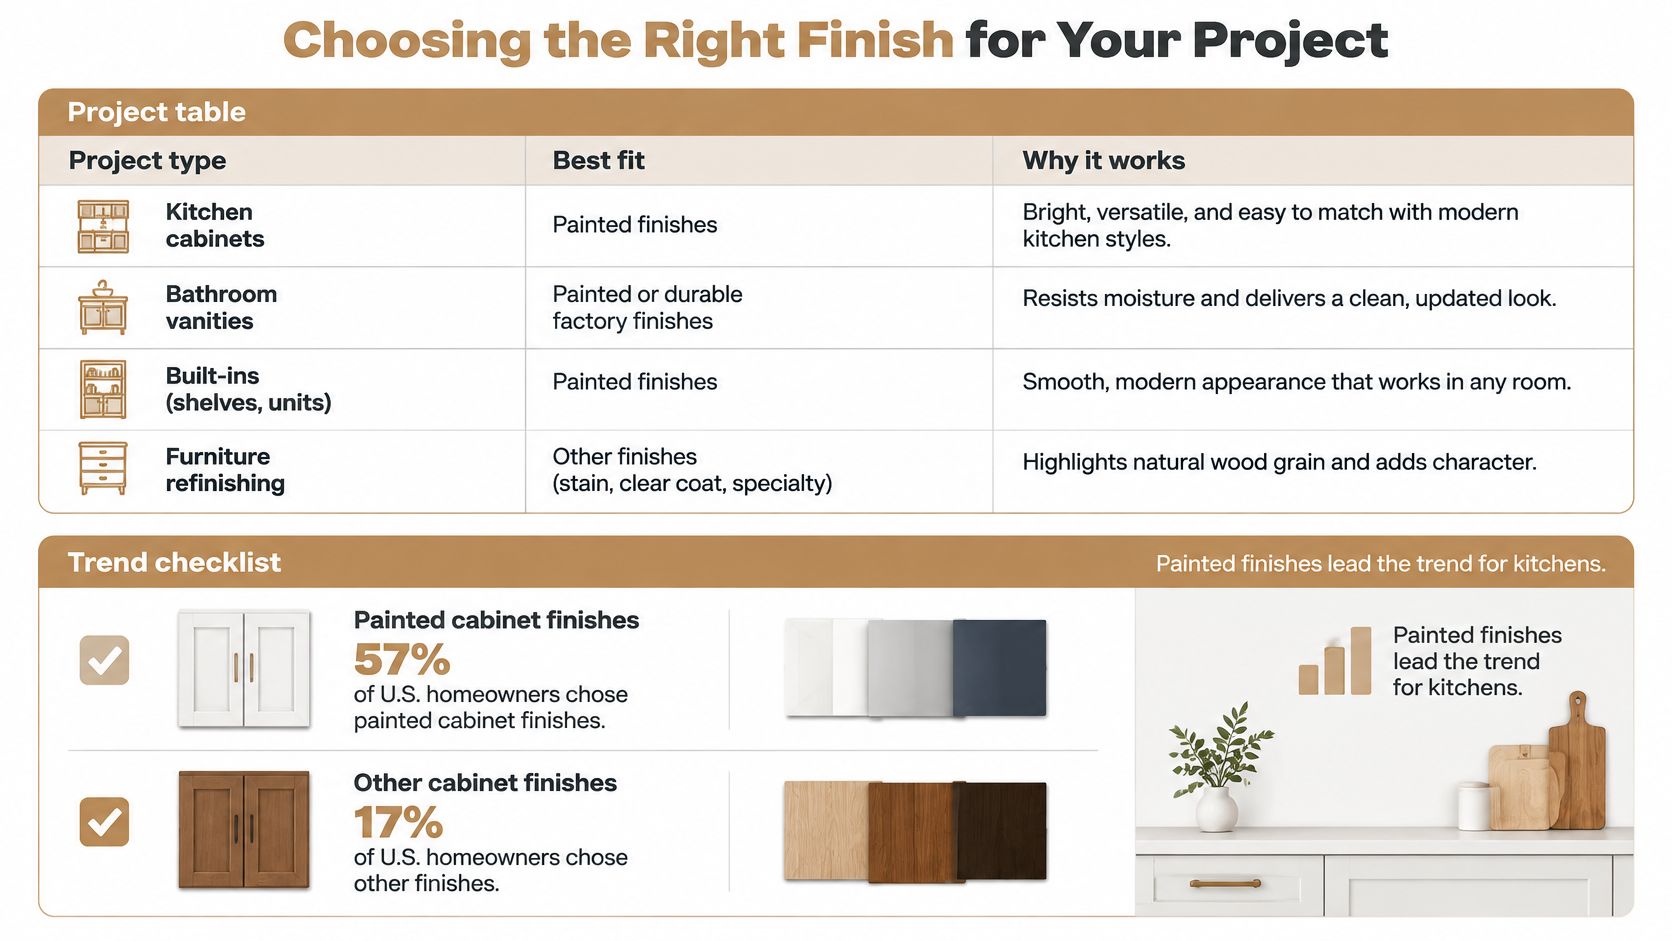
Matching the finish to the project is easier when you look at common situations side by side. This table gives the usual starting point for each one.
Usually Better Fit by Project Type
| Project | Usually Better Fit | Main Reason |
|---|---|---|
| Kitchen cabinets with attractive grain | Stain | Keeps the look of the wood |
| Kitchen cabinets with a dated or mismatched finish | Paint | Gives one even color and hides variation |
| Solid wood entry doors | Stain with UV-stable topcoat | Shows grain while protecting from sun |
| Exterior decks | Penetrating exterior stain | Handles sun, heat and moisture and can be refreshed |
| Restaurant bar tops and tables | Catalysed clear or stain system | Stands up to sanitizer, spirits and daily service |
| Office or hotel millwork with mixed pieces | Paint | Conceals differences between boards |
| Trim matching existing woodwork | Match existing finish | Samples confirm the color before full work |
What Homeowners Are Choosing
If you're torn, you're not alone, though paint currently leads in kitchens. The 2025 U.S. Houzz Kitchen Trends Study, based on a survey conducted in 2024, found that 57% of homeowners chose painted cabinet finishes and 17% chose stained finishes. Paint is the more common kitchen choice, while stain remains a strong pick for people who want the wood itself to show.
The Two Main Service Paths
Cabinet staining or restaining changes the tone of the wood while keeping the grain. In our process, samples are finished in your own wood species first, so the color you approve is the color your cabinets will take.
Cabinet painting gives you one even color across every door and box. Our cabinet painting is sprayed factory-smooth in the color you choose, with proper priming so edges hold up to daily use. That's often the right call when the existing finish is dated or the cabinets are a mix of materials.
Commercial surfaces follow the same logic with tougher duty in mind. Our wood finishing and refinishing restores tables, bar tops, and facades in place or in our shop, rebuilt in catalysed coatings that stand up to sanitiser, spirits and constant service.
Cabinet refinishing and broader wood finishing services cover the wider range, from doors and trim to architectural millwork. Results always depend on wood species, current condition, and the chosen finish, which is why the project table is a starting point rather than a final answer.
Common Questions About Stain and Paint
Is stain or paint easier to touch up later?
Stain can often be refreshed by cleaning and re-coating a worn area, though blending new color into old may show a little. Paint touch-ups happen at chips and worn edges, and they need to match both color and sheen to disappear.
Can I paint over stained wood?
Often, yes. The surface needs cleaning, scuff sanding, and a bonding primer suited to the existing finish first. Skipping the primer is the most common reason paint over stain fails early.
Does stain hide scratches or dents?
No. Stain leaves grain and minor marks visible, and damaged spots can absorb color differently and stand out more. Fill and repair first, and test any filled area, since filler doesn't take stain like wood does.
Which is better for a kitchen in Austin or Round Rock?
It depends on your wood's look and condition, not your zip code. Many homeowners in Austin, Round Rock, Cedar Park, and Georgetown choose paint for an even color, while those with strong grain they love often choose stain. Both work well here when prep and product choices fit the space.
Do stain and paint need the same maintenance?
Both benefit from gentle cleaning and a periodic look-over for wear. Repairs differ, since stained areas are usually refreshed with a new coat and painted areas are touched up or recoated to match.
Is there a guaranteed lifespan?
No. Exposure, wood type, and day-to-day care decide how long any finish lasts. If you'd like help weighing your options, a consultation with a personalized estimate is a sensible next step.
Confirm Your Finish Before the Work Starts
The best next step is simple. Test the choice on real wood before you commit to a whole kitchen, door, or room of millwork.
A sample on your actual cabinet door or board shows how color, grain, and sheen look in your room's light, morning and evening. For cabinet painting, a sample door can be prepared so you can see the color before the full job if you'd like one. It removes the guesswork that a paint chip or stain label can't.
Steps You Can Take Now
- Look in daylight: Check your wood in natural light and note how much grain you want to keep.
- Judge the current finish: Decide whether it's worn, peeling, or dated.
- Note how it's used: A busy family kitchen, an outdoor deck, and a commercial bar each ask different things of a finish.
- Gather photos: Bring pictures and your notes from the earlier checks.
- Talk it through: Use a consultation to discuss the look, the wood's condition, and the approach that fits.
Every project is unique, so a personalized estimate is the best way to plan yours, and the quote for cabinet restaining is free. RMK Contractors serves Austin, Round Rock, Cedar Park, Leander, Pflugerville, Georgetown, Lakeway, and nearby Central Texas areas.
When you're ready, reach out and we'll talk through your wood, your space, and which finish makes sense. There's no pressure to decide on the spot.
If you're weighing cabinet painting, cabinet staining, or a full wood refinishing project, we'd be glad to look at your surfaces, prepare a sample, and talk through which finish fits your goals. Visit RMK Contractors to request your free, personalized estimate and get honest guidance for your Central Texas home or business.